This guide walks you through containerizing a Spring Boot application using Docker.
How to create a multi-stage Dockerfile, use Docker Compose for local development, and prepare your application for deployment to AWS ECR/ECS.
Table of Contents
- Step 1: Build the JAR File
- Step 2: Create Dockerfile
- Step 3: Create Docker Compose Configuration
- Step 4: Build and Run the Docker Container
- Step 5: Test the Application
- Step 6: Stop and Clean Up
Step 1: Build the JAR File
Before creating the Docker image, build your Spring Boot application:
# Clean previous builds and package
mvn clean package -DskipTests

# The JAR file will be created in target/ directory
# Verify it exists:
ls target/*.jar  # Unix/macOS/Linux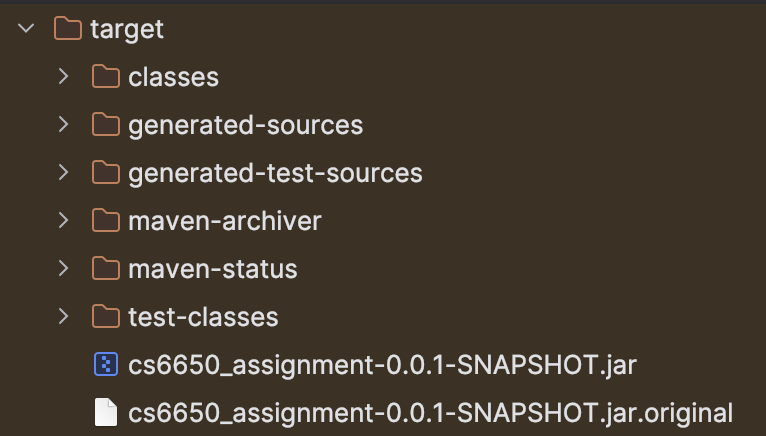
Expected output:
- A JAR file in
target/directory (e.g.,target/hello-service-0.0.1-SNAPSHOT.jar)
Note: The -DskipTests flag skips tests for faster builds. Remove it if you want to run tests during build.
Step 2: Create Dockerfile
A Dockerfile is a recipe that defines how to build a Docker image. This example uses a multi-stage build for optimization:
- Stage 1: Build the application using Maven
- Stage 2: Create a lightweight runtime image with only the JAR file
Dockerfile
# Stage 1: Build stage using Maven
FROM maven:3.9-eclipse-temurin-17 AS builder

# Set working directory
WORKDIR /app

# Copy Maven configuration
# This allows Docker to cache dependencies separately
COPY pom.xml .

# Download dependencies (cached if pom.xml hasn't changed)
RUN mvn dependency:go-offline

# Copy source code
COPY src ./src

# Build the application
RUN mvn clean package -DskipTests

# Stage 2: Runtime stage using lightweight JDK
FROM openjdk:17.0.1-jdk-slim

# Create non-root user for security
RUN groupadd -g 1000 spring && useradd -u 1000 -g spring -s /bin/sh -M spring

# Set working directory
WORKDIR /app

# Copy JAR from builder stage
COPY --from=builder /app/target/*.jar app.jar

# Change ownership to non-root user
RUN chown -R spring:spring /app

# Switch to non-root user
USER spring

# JVM memory settings for containers
ENV JAVA_OPTS="-Xmx512m -Xms256m"

# Expose the port your app runs on
EXPOSE 8080

# Run the application
ENTRYPOINT ["sh", "-c", "java $JAVA_OPTS -jar /app/app.jar"]
Key Features
- Multi-stage build: Reduces final image size by excluding build tools
- Non-root user: Improves security by running as non-privileged user
- Layer caching: Dependencies are cached separately from source code
- JVM optimization: Memory settings optimized for containers
Build the Image
docker build --platform linux/amd64 -t echo-service:latest .# Build the Docker image
docker build -t hello-service:latest .
# Verify the image was created
docker images | grep hello-serviceStep 3: Create Docker Compose Configuration
Docker Compose allows you to define and run multi-container applications with a single command. It’s perfect for local development.
docker-compose.yml
version: '3.8'

services:
  hello-service:
    # Build from current directory
    build:
      context: .
      dockerfile: Dockerfile

    # Container name for easier identification
    container_name: hello-service-container

    # Port mapping: host:container
    ports:
      - "8080:8080"

    # Environment variables
    environment:
      - SPRING_PROFILES_ACTIVE=docker
      - JAVA_OPTS=-Xmx256m -Xms128m

    # Health check
    healthcheck:
      test: ["CMD", "wget", "--quiet", "--tries=1", "--spider", "http://localhost:8080/api/hello"]
      interval: 30s
      timeout: 10s
      retries: 3
      start_period: 40s

    # Restart policy
    restart: unless-stopped

    # Resource limits
    deploy:
      resources:
        limits:
          cpus: '0.5'
          memory: 512M
        reservations:
          cpus: '0.25'
          memory: 256M
Understanding Docker Compose
When you use build: . or build: { context: ., dockerfile: Dockerfile } in compose:
- Docker Compose looks for the Dockerfile in the
build.contextdirectory - Builds an image using that Dockerfile
- Uses that image to start the container
Important: docker compose up does not always rebuild the image. Use --build flag to force rebuild.
Step 4: Build and Run the Docker Container
Start the Container
# Build and start the container
docker compose up --build

# Or run in detached mode (background)
docker compose up --build -d
docker compose up --build -d hello-service up the server base on docker-compose.yml
- Example
services:
  hello-service:
    build: .
    ports:
      - "8080:8080"
Understanding Docker Compose Commands
docker compose up: Starts containers (uses existing images if available)docker compose up --build: Rebuilds images before starting containersdocker compose up -d: Runs in detached mode (background)docker compose logs: View logsdocker compose logs -f: Follow logs in real-time
Verify Container is Running
# List running containers
docker ps

# Check container logs
docker compose logs hello-service

# Check container health
docker inspect hello-service-container | grep Health
Step 5: Test the Application
Once the container is running, test your application:
# Basic test
curl http://localhost:8080/api/hello

# Test POST endpoint
curl -X POST http://localhost:8080/api/echo -d "hello"

# Test with your name
curl http://localhost:8080/api/hello/YourName
Expected response: JSON response from your Spring Boot application.
Step 6: Stop and Clean Up
Stop Containers
# Stop containers (keeps containers and data)
docker compose stop

# Stop and remove containers (removes containers, keeps volumes)
docker compose down

# Stop and remove everything including volumes (most destructive)
docker compose down -v
Understanding Cleanup Commands
| Command | What it does | Data loss? |
|---|---|---|
docker compose stop | Stops containers | No - data preserved |
docker compose up | Restarts containers | No - may reuse existing container |
docker compose up --build | Rebuilds and restarts | Yes - creates new container |
docker compose down | Removes containers and network | Yes - container data lost |
docker compose down -v | Removes containers, networks, and volumes | Yes - all data lost |
Manual Cleanup (if needed)
If you need to manually remove containers and images:
# 1) List containers
docker ps -a

# 2) Stop container (if running)
docker stop <container_id>

# 3) Remove container
docker rm <container_id>

# 4) List images
docker images

# 5) Remove image
docker rmi <image_name>:<tag>

# Example:
docker stop 74452aaf201a
docker rm 74452aaf201a
docker rmi cs6650_assignment-hello-service:latest
Next Steps: Push to AWS ECR
After successfully dockerizing your application locally, you can push it to AWS ECR for deployment:
1. Tag the Image for ECR
# Get your ECR repository URL (replace with your values)
ECR_URL="<account-id>.dkr.ecr.<region>.amazonaws.com/<repository-name>"

# Tag the image
docker tag hello-service:latest ${ECR_URL}:latest
2. Login to ECR
# Login to ECR
aws ecr get-login-password --region <region> | \
  docker login --username AWS --password-stdin ${ECR_URL}
3. Push to ECR
# Push the image
docker push ${ECR_URL}:latest
4. Verify Push
# List images in ECR
aws ecr list-images \
  --repository-name <repository-name> \
  --region <region> \
  --query 'imageIds[*].imageTag' \
  --output table
Troubleshooting
Build Issues
| Issue | Solution |
|---|---|
| ”Cannot find Dockerfile” | Ensure Dockerfile is in the current directory |
| ”Maven build fails” | Check pom.xml and ensure dependencies are correct |
| ”Out of memory during build” | Increase Docker memory limit in Docker Desktop settings |
Runtime Issues
| Issue | Solution |
|---|---|
| ”Port already in use” | Change port mapping in docker-compose.yml or stop conflicting service |
| ”Container exits immediately” | Check logs: docker compose logs hello-service |
| ”Application not accessible” | Verify port mapping and firewall settings |
| ”Health check fails” | Ensure health check endpoint exists and is accessible |
Common Commands
# View logs
docker compose logs -f hello-service

# Execute command in running container
docker compose exec hello-service sh

# Restart service
docker compose restart hello-service

# Rebuild without cache
docker compose build --no-cache

# View resource usage
docker stats hello-service-container
Best Practices
1. Multi-Stage Builds
- Use multi-stage builds to reduce image size
- Separate build dependencies from runtime dependencies
2. Non-Root User
- Always run containers as non-root user for security
- Create a dedicated user in Dockerfile
3. Layer Caching
- Copy dependency files (
pom.xml) before source code - This allows Docker to cache dependency layers
4. Resource Limits
- Set CPU and memory limits in Docker Compose
- Prevents containers from consuming all host resources
5. Health Checks
- Add health checks to detect when application is ready
- Useful for orchestration platforms (ECS, Kubernetes)
6. Environment Variables
- Use environment variables for configuration
- Don’t hardcode sensitive values in Dockerfile
Key Concepts
Dockerfile vs Docker Compose
- Dockerfile: Defines how to build a single image
- Docker Compose: Defines how to run multiple containers together
Image vs Container
- Image: Template/blueprint (like a class)
- Container: Running instance of an image (like an object)
Multi-Stage Build Benefits
- Smaller final image: Excludes build tools
- Faster builds: Better layer caching
- Security: Fewer tools in production image